
Many companies work with the same party as both a customer and a vendor. This often results in open customer invoices and vendor invoices that could simply offset one another instead of being paid and collected separately.
This is exactly what Customer and Vendor netting in D365FO is designed to solve. Netting allows an organization to offset balances between a customer account and a vendor account that belong to the same business entity. Instead of making two separate payments, the system calculates the difference and settles the smaller balance automatically.
Prerequisites
Journal name and main account for “Netting” should be created.
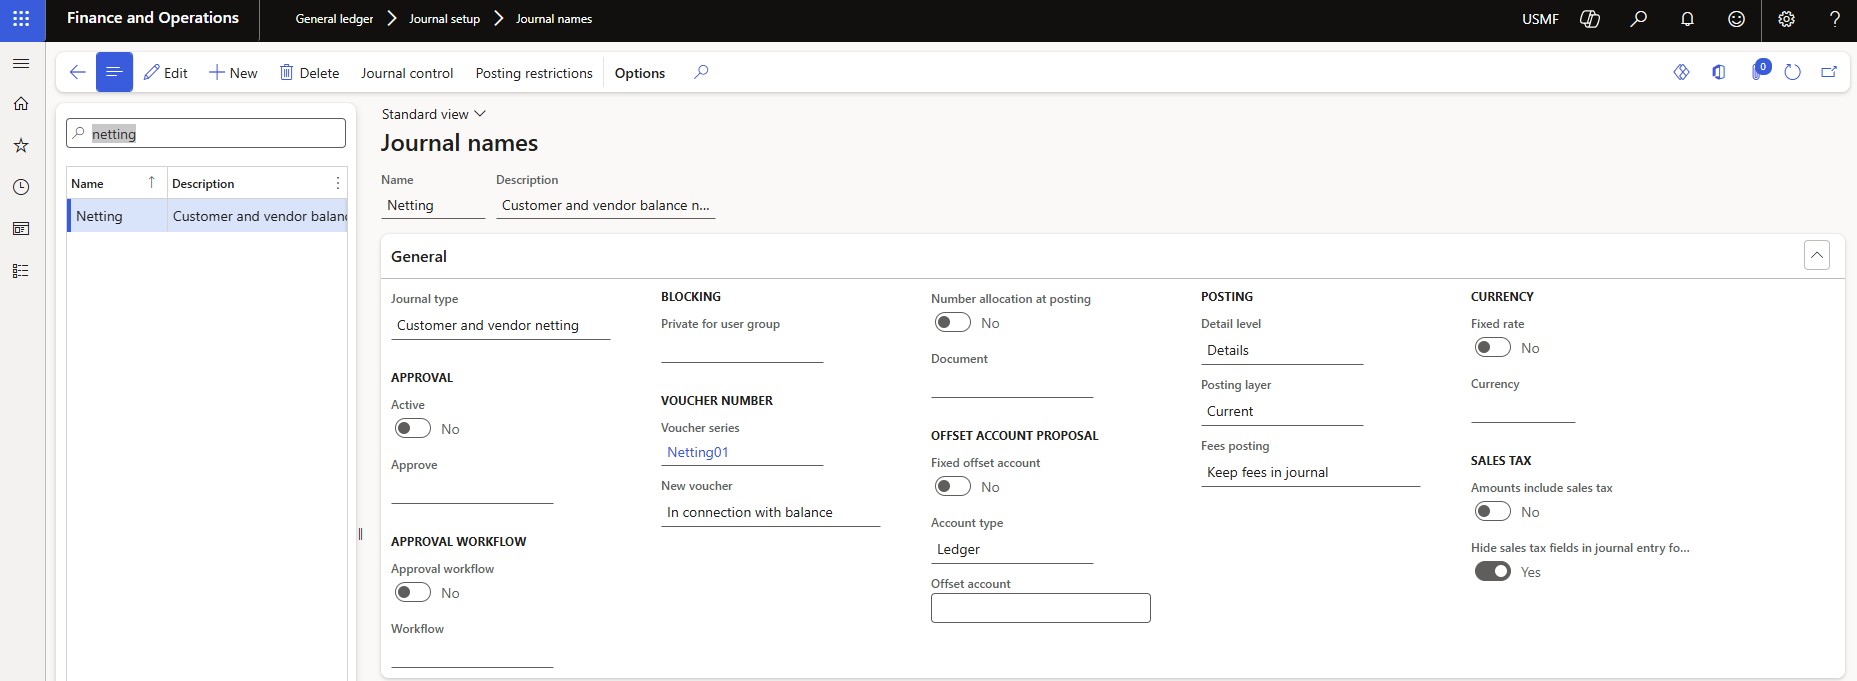
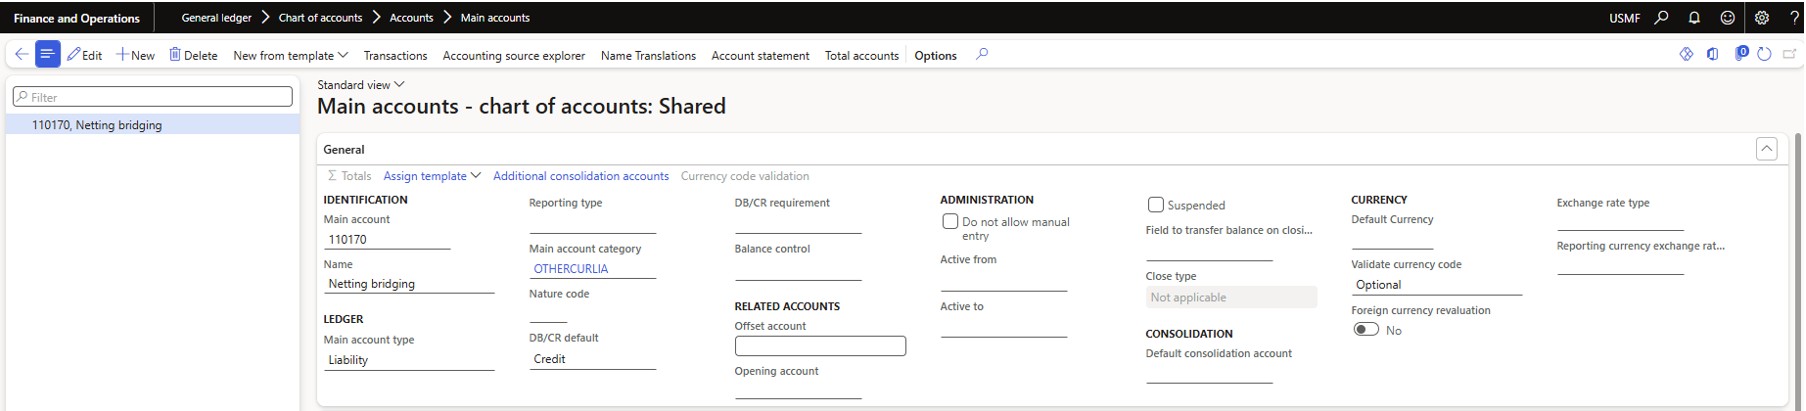
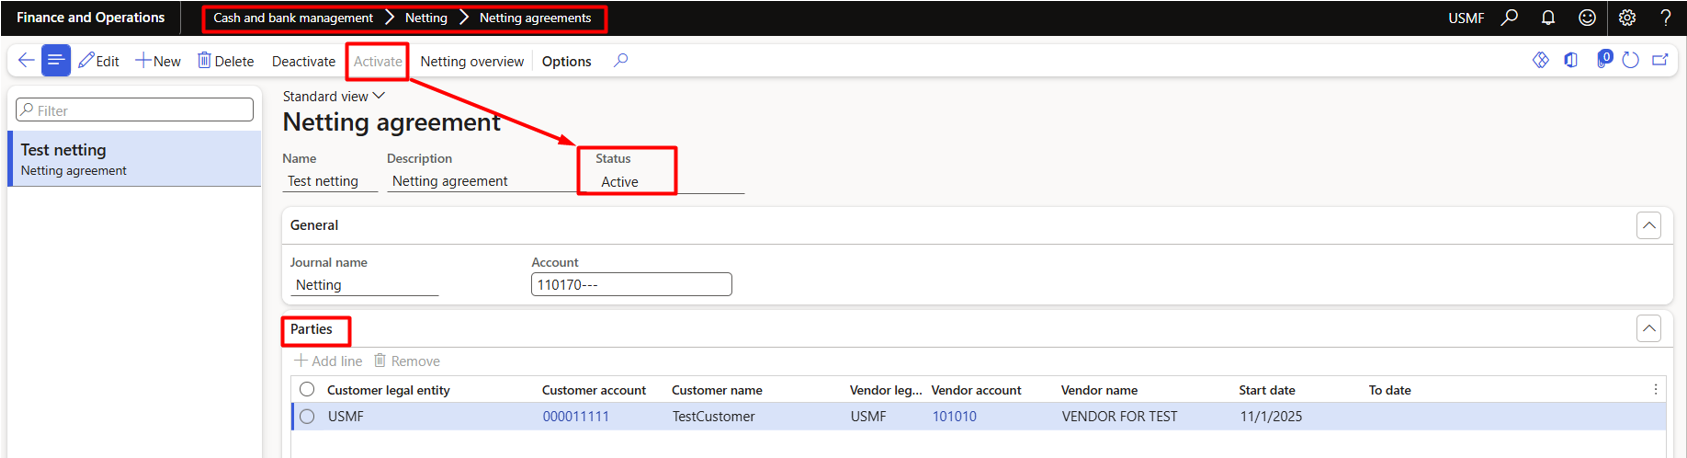
Next step is to create Netting agreement which lets you maintain the Pairs of customer and vendor accounts for netting. Must be activated before creating netting transactions.
How the process works
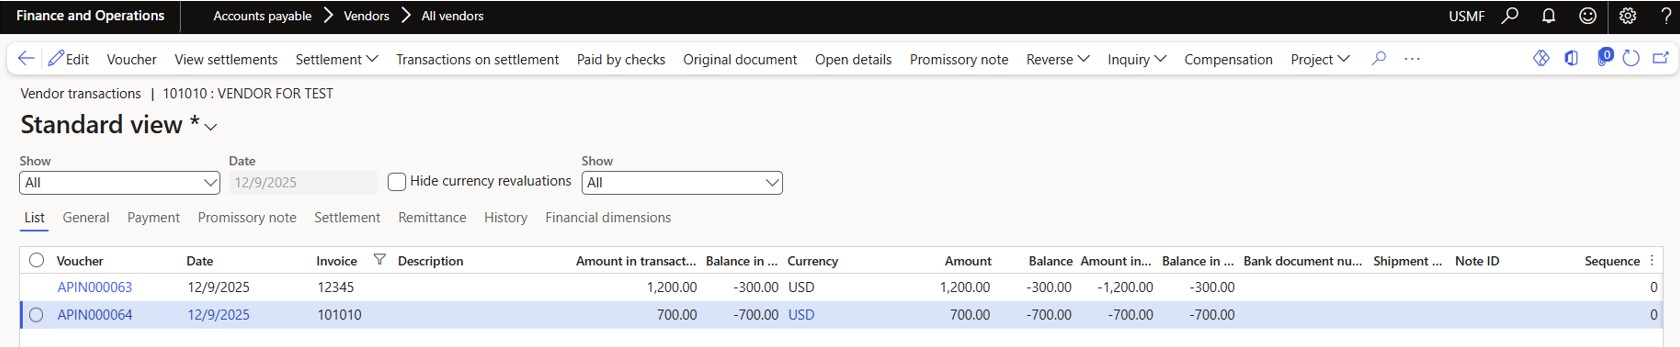
The Vendor and the Customer from the Pair have open invoices
Example of Customer open invoices

Example of Vendor open invoices
Under Cash and Bank management > Netting > Customer and vendor balance netting, select the Netting agreement and click on “Create netting” button.

Then select and mark the open customer and vendor invoices you want to net, enter the Netting posting date and “Post” the netting journal.

With this, the system will calculate the netting amount and settle the selected invoices.
From the example used in this text, netting amount is 1,000 USD, and remaining Balance on the customer invoices is 200 USD.
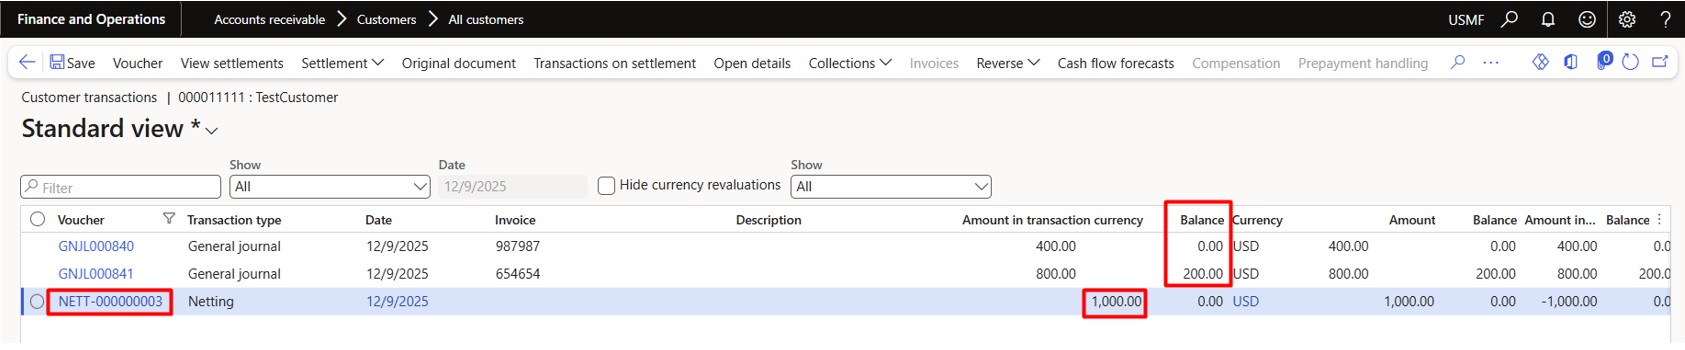
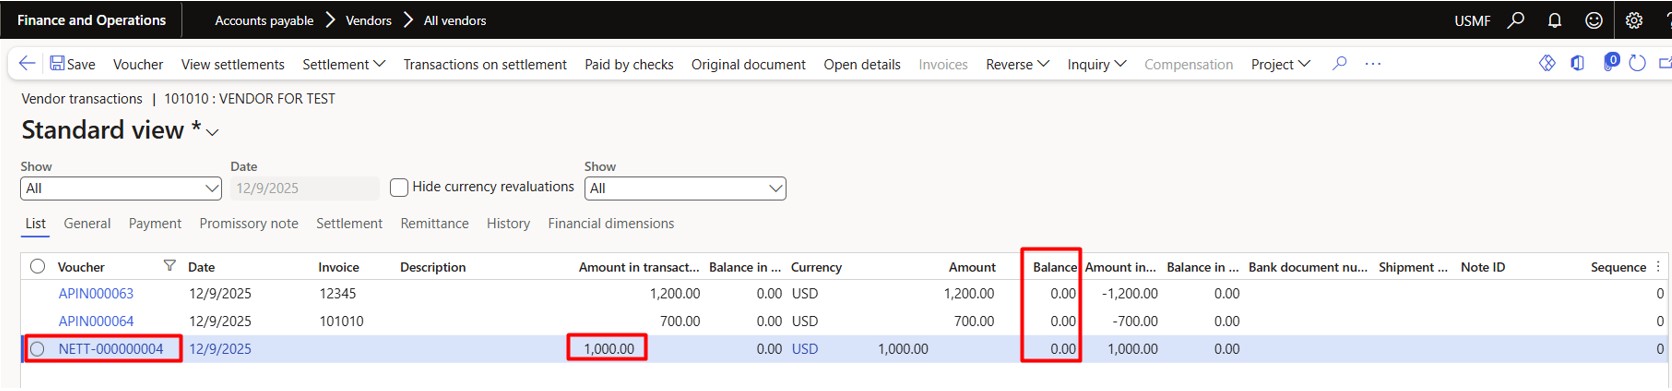
On the vendor’s side, the netting amount is 1,000 USD, and the remaining Balance is 0,00 USD.
Automatic netting
This process can be automated by defining a Netting rule and then running it through a batch job. It can be created under Cash and bank management > Netting rules
For the netting rule should be selected one of the available Netting sequences, to specify if it should apply on “All agreements” or “Selected”, and then Include credit note and debit note. If will apply only on Selected agreements, they should be specified under “Netting agreement” tab. Under the “Netting criteria” tab, can be defined additional criteria if needed. Then should “Activate” the rule.
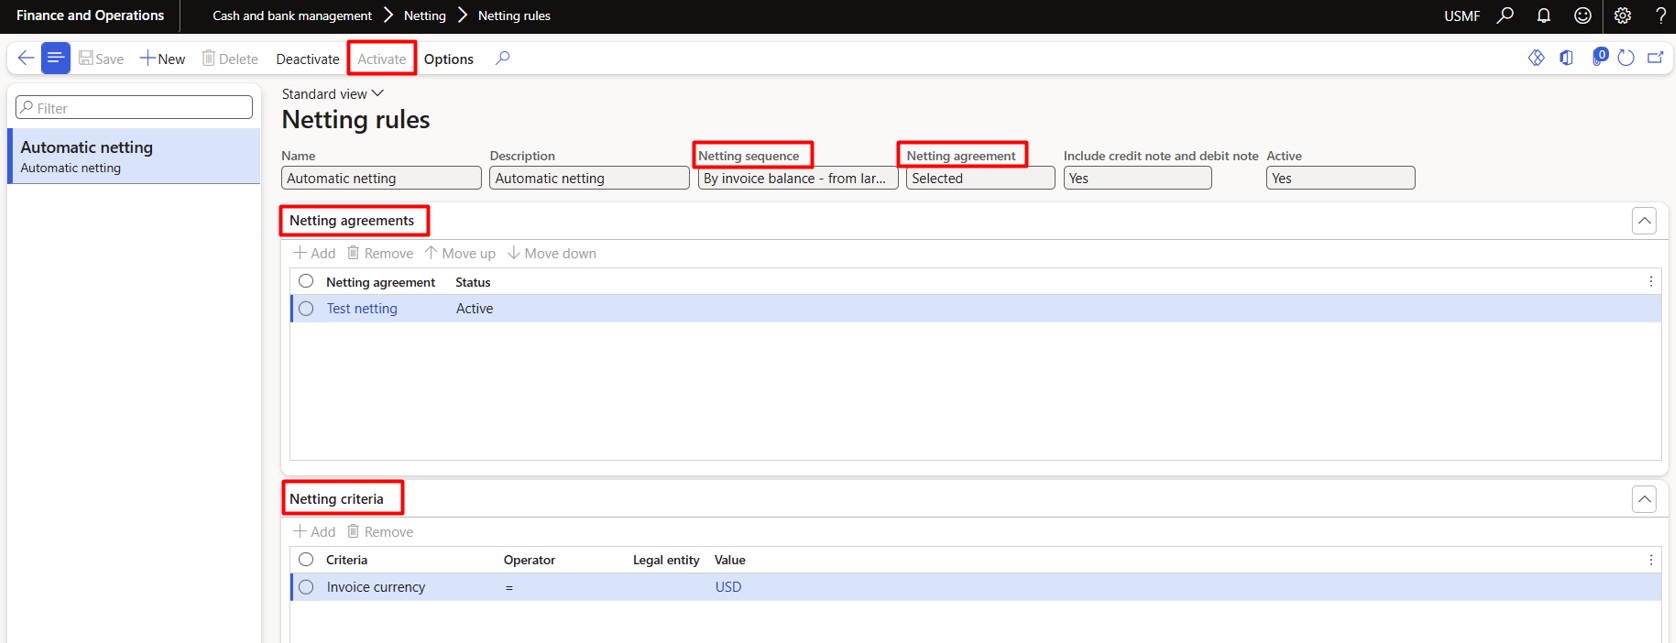
To run it you can schedule Periodic automatic netting under Cash and bank management > Netting > Process automation or you can trigger one-time automatic netting under Cash and bank management > Netting > Automatic netting.